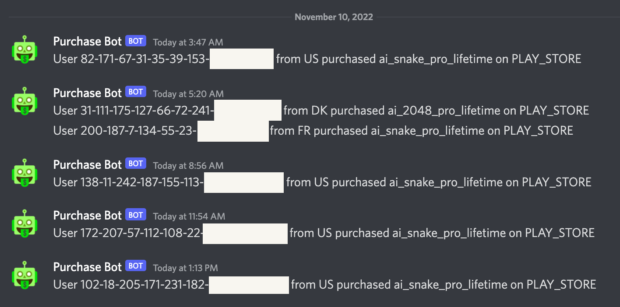
Recently I made a Discord bot for RevenueCat. It posts in-app-purchase purchase notifications from my mobile apps (AI Simulator) into my Discord server.
Here’s how to it setup.
Prerequisites
To make everything work, you will need 3 parts:
1. Webhook Trigger
I am using RevenueCat to manage to in-app-purchase. It comes with webhook support by default, so I can get a webhook event every time a purchase is made. This webhook serves as the trigger.
As of Nov 2022, RevenueCat has direct integration to Slack for posting purchase notifications, but not for Discord. This is why I have to make one myself using webhook.
Alternatively, you could also directly use webhook events provided by Apple App Store and Google Play Store, which is where RevenueCat gets the events from.
2. Workflow Processor
You will need some kind of logic to process the webhook event and transform it to whatever format that the bot accepts.
You can write your simple server to do the job, but I tried to experiment with workflow engine for this project. A workflow engine is typically a low code / no code platform that allows you define a workflow that triggers when something happens.
I used n8n mainly because it is open-source so that I can host it myself. Zapier seems to be a popular alternative but to use webhooks you need a paid account.
3. Discord Bot
Finally you need a bot to receive the event processed by the workflow processor and send it to Discord.
For Discord servers, this is pretty easy as you can setup a webhook inside a server, and it will automatically become a bot that posts messages received from the webhook.
Connecting It Up
First you need to setup the workflow engine to receive the webhook event.
For me, I chose to self-host n8n using Docker on a cheap DigitalOcean VPS.
Once you have n8n setup with SSL certificate (I use certbot), you can visit its UI dashboard to create a workflow.
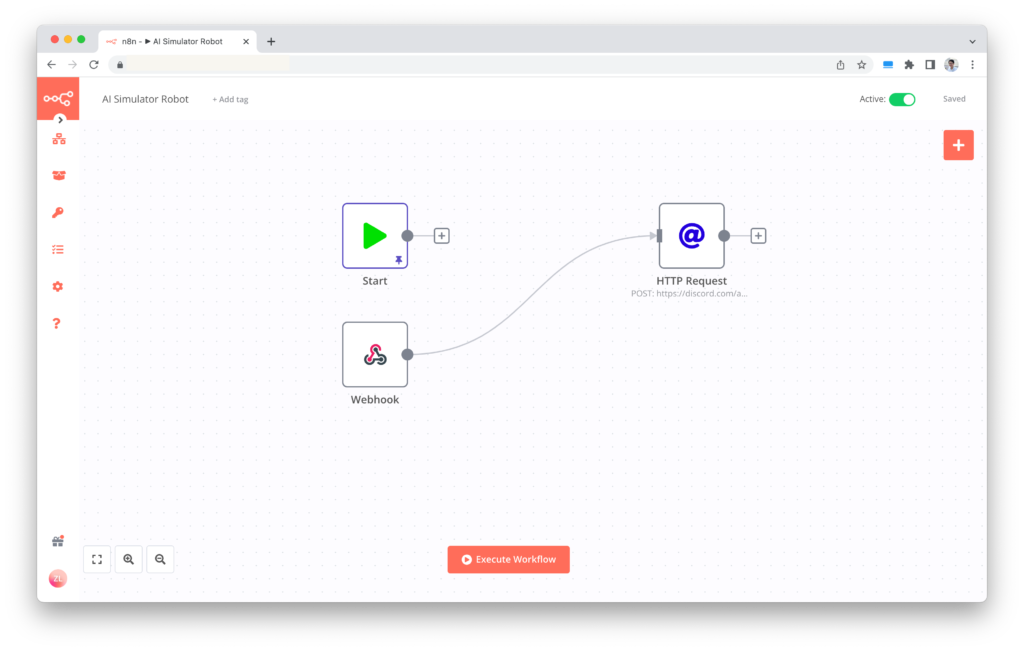
You will get a webhook URL by adding a webhook trigger node.

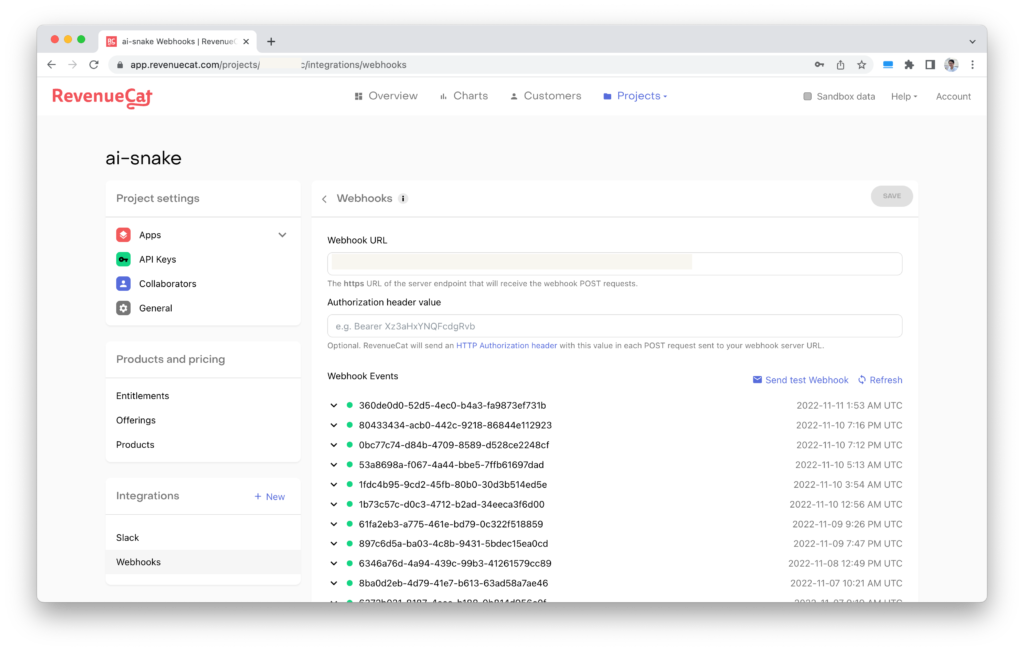
Since you want it to be receiving traffic from as the webhook trigger, you can replace the localhost part with the real domain name and use that as the webhook URL.
You can fill the webhook URL into RevenueCat webhook integration settings and fire some test events to make sure your webhook can receive events.
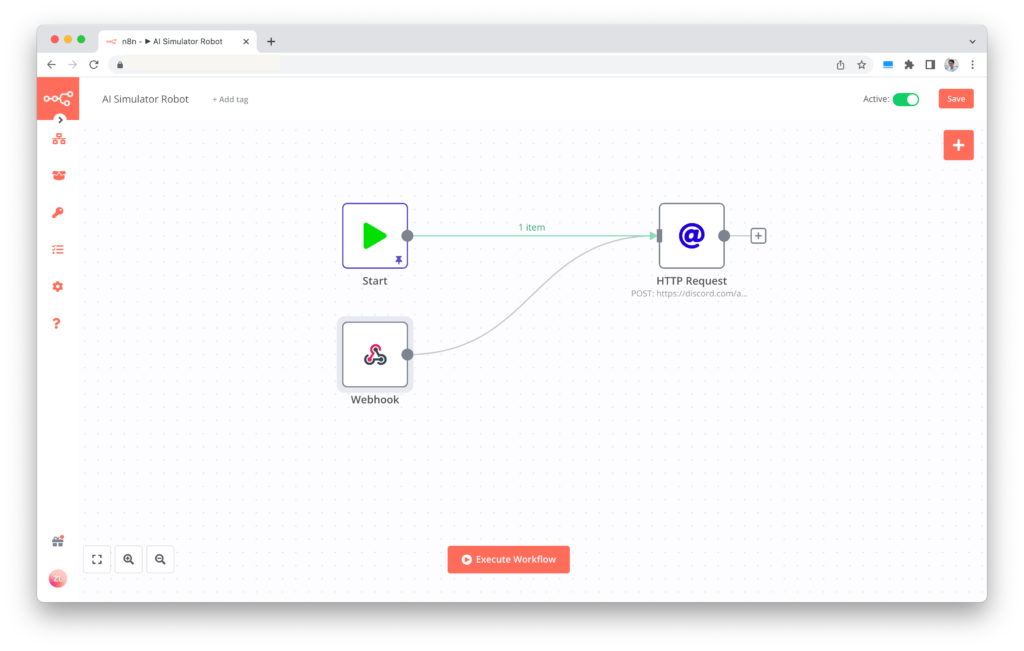
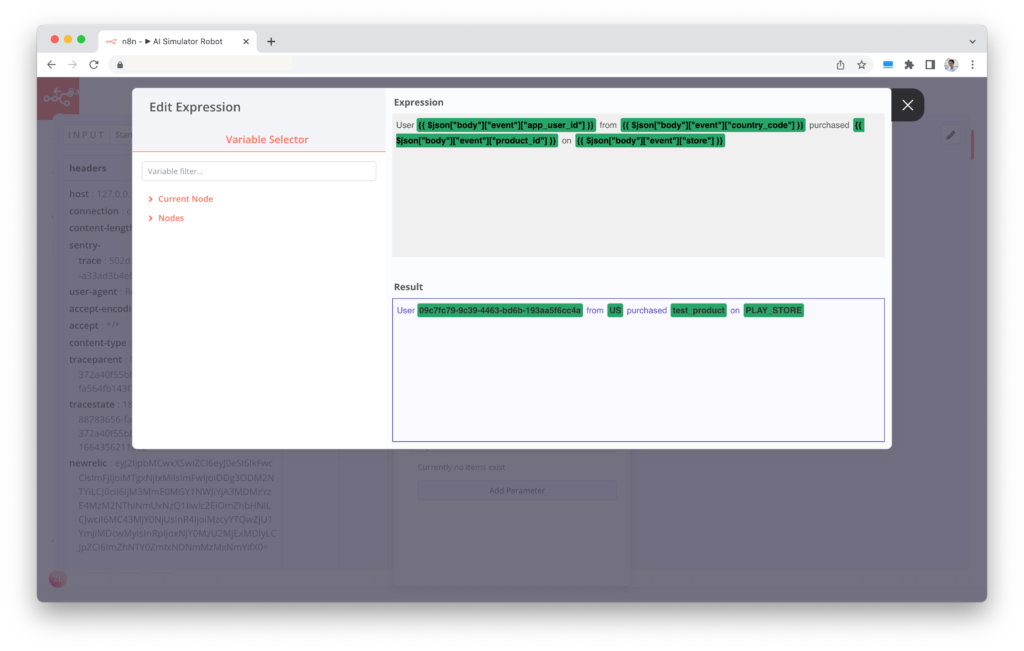
Once you have successfully received the event, you can use a dummy Start node to “pin” (hardcode) the trigger event and link it to an HTTP Request node.
Then you can write and test your workflow processing logic in the HTTP Request node.
It is basically just getting the JSON fields that you need (user id, country, product name, etc) and putting them together into a nice message.
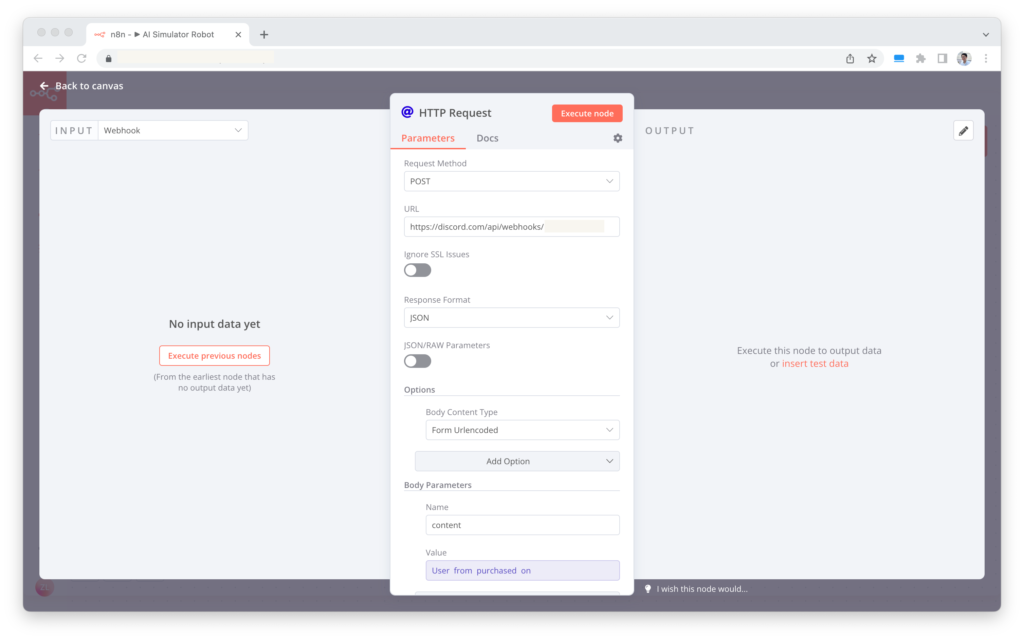
The last piece of work is to configure the HTTP Request node to send the message to Discord.
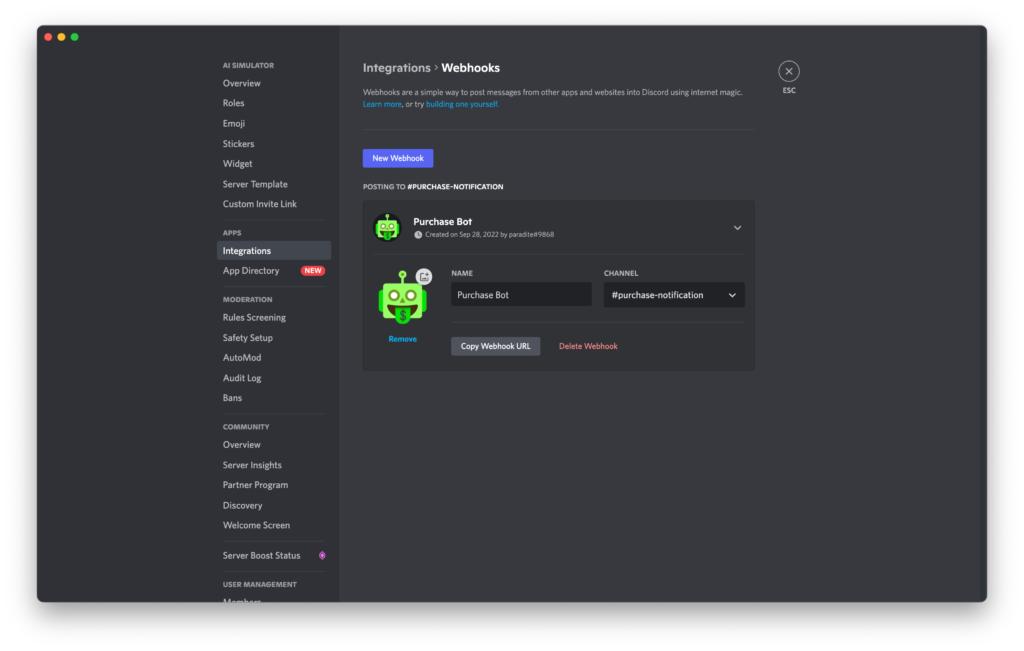
You can get the Discord webhook URL by creating a webhook inside your Discord server.
Then you can configure your HTTP Request node to send in the Discord webhook format. It is just a POST request with content as body.
Save everything and send some test events from RevenueCat.
There you go, you now have a functioning Discord bot for RevenueCat purchase events.
Learn more about projects that I am working on.