

This is a guide for setting up Font Awesome in Angular 2 with webpack.
Although this guide is written at the time of Angular 2, it should also work for Angular 4 and future versions of Angular, according to the official Angular branding guideline.
Font Awesome is a hugely popular package for icons. Back in the days, you could just include css and font files in index.html. However, with so many new technologies, it has become increasing hard to integrate 3rd party library into our web app project.
Of course we can still use a CDN to serve static resources, but that’s not helpful when we need to test locally. It also adds external dependency which we have no control over. Hence, we need an idiomatic way to use Font Awesome in Angular 2 with webpack.
This guide is based on a fantastic gist for font awesome with webpack and assume that you have followed the official guide on Angular 2 with webpack.
Non-idiomatic Approaches (Not Recommended)
A simple way to add font awesome in Angular 2 is to include font-awesome.css in index.html. But that it is not idiomatic to Angular 2 as you are introducing global style sheets outside the Angular 2 framework.
There are also 3rd party wrappers for font-awesome but using them carries unnecessary risks as they are not officially supported by either webpack or font-awesome.
Idiomatic Approach, in 3 steps
Instead, I will describe a way to add font-awesome as a vendor library using only the official tools and packages. The complication is that font awesome includes many font files that are not typically included in an npm package, so we need to handle them properly in webpack configurations.
Step 1 – Install necessary npm packages:
- official font-awesome on npm (yes, you can find everything on npm)
|
1 |
npm install --save font-awesome |
- official url loader by webpack to load the font files that come with font awesome
|
1 |
npm install --save-dev url-loader |
Step 2 – Edit the webpack config file webpack.common.js:
The config file specifies how we are going to load the various static resource files that come with font awesome.
In particular we modify the original loader for various font files, woff, eot, svg, etc:
Original config:
|
1 2 3 4 |
{ test: /\.(png|jpe?g|gif|svg|woff|woff2|ttf|eot|ico)$/, loader: 'file?name=assets/[name].[hash].[ext]' } |
We replace this with a bunch of new tests and loaders:
New config:
|
1 2 3 4 5 6 7 8 9 10 11 12 13 14 15 16 17 18 19 20 21 22 23 24 25 |
{ test: /\.(png|jpe?g|gif|ico)$/, loader: 'file-loader?name=assets/[name].[hash].[ext]' }, { test: /\.woff(\?v=\d+\.\d+\.\d+)?$/, loader: 'url-loader?limit=10000&mimetype=application/font-woff' }, { test: /\.woff2(\?v=\d+\.\d+\.\d+)?$/, loader: 'url-loader?limit=10000&mimetype=application/font-woff' }, { test: /\.ttf(\?v=\d+\.\d+\.\d+)?$/, loader: 'url-loader?limit=10000&mimetype=application/octet-stream' }, { test: /\.eot(\?v=\d+\.\d+\.\d+)?$/, loader: 'file-loader' }, { test: /\.svg(\?v=\d+\.\d+\.\d+)?$/, loader: 'url-loader?limit=10000&mimetype=image/svg+xml' }, // other lodaers... |
Webpack 2’s Mandatory -loader Suffix
Note that we use url-loader and file-loader instead of the usual url and file shorthand in the webpack config above. Otherwise, you will get an error:
|
1 |
Error(“Module ‘” + loader.path + “‘ is not a loader (must have normal or pitch function)”); |
The reason for the change is webpack 2’s new requirements for loaders, which disallows shorthand: https://github.com/webpack/url-loader/pull/55
Now we have all the necessary setup, all that’s left is to formally introduce font awesome into our project.
Step 3- Add Dependency Into Angular 2
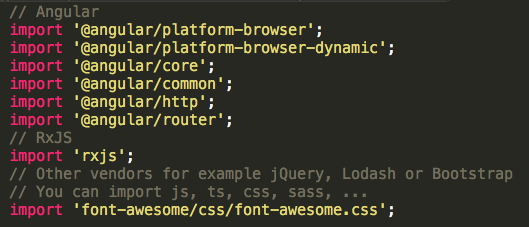
The last step is to open vendor.ts and add the dependency here:
|
1 |
import 'font-awesome/css/font-awesome.css'; |
That’s it. Webpack will take care of the rest from here. Definitely more complicated than including the css file directly into html (which won’t work in production environment due to folder hierarchy issues), but not super complicated or hackish.